How To Use the DualEdgeRipper
Making a hand torn print or deckle edge the “Ripper” way...
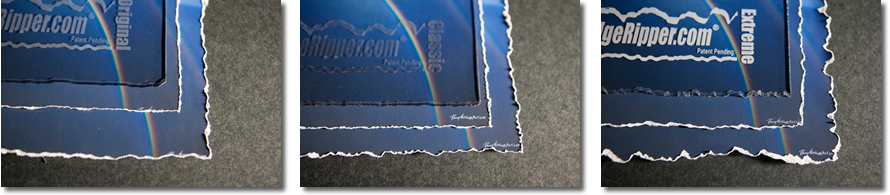
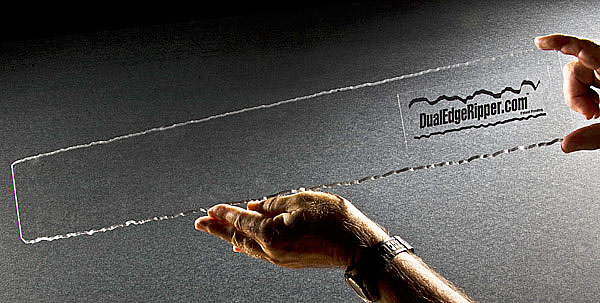
- The Standard Dual Edge Ripper is made of clear Lucite, and is 24 inches long and 4 inches wide.
-
The Lucite strip has two uniquely cut ragged edges. One side has fine "teeth", and the other side has course "teeth".
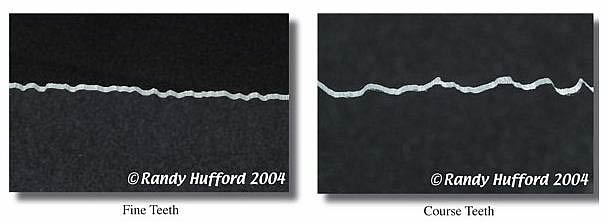
- These teeth are cut on a bevel angle in order to tear paper in a unique way.
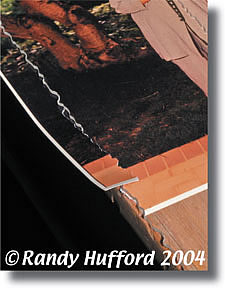
- The ripper is placed over the paper and the edge of the paper is pulled up toward you. Notice in this view print is face up. Face up gives a white reveal.
- Use a table with a square edge keeping ripper parallel and even to edge of table, allowing the part of the print to be torn off to exceed past the edge of the table. Notice in this view print is face down. Face down gives no reveal.
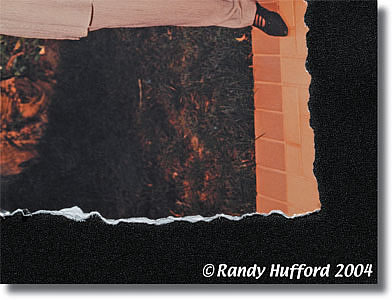
- Here is a close up of creating a unique rip that simulates a "deckle edge." This sample has utilized the course edge of the ripper and has been done on a photo print. Notice that the right to left edge shows a white reveal (tearing with image facing up), the up and down edge shows no reveal (tearing with image facing down).
- If your print is wider or longer than 24", just move the ripper and continue ripping.
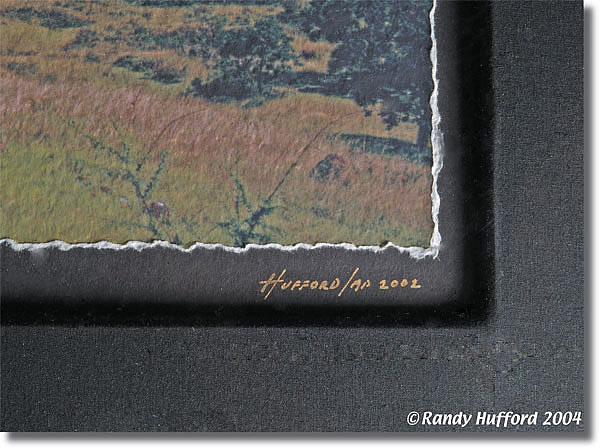
- Here's a deckle edge border, using the "smooth" or fine teeth side of the ripper. All four borders were deckled (only two sides are shown in this photo) AFTER the paper had been printed with an image (it's much easier to feed the paper into the printer that way). TIP: If you want to have a 1 inch border with a deckled edge around your image, you'll need to leave at least 2 inches of border around the image, because you'll want at least an inch of paper to hold onto when you do your ripping
- Here's a view of the deckle edged print that has been matted and framed. TIP: Mount the print to a sheet of 4 ply mat board that is about 1/4" smaller than the deckle edged print, then mount that mat board to the mounting board that goes into the frame behind the glass and beveled mats (double matting is necessary to give the depth you'll need to for this technique). The mat behind the print act as a "pedestal", raising the print enough to create a nice drop shadow, and producing a very artistic and three-dimensional quality to your displayed art.
-
Torn Edges with a White Reveal: The Dual Edge Ripper is featured in Randy's The Perfect Print Finishing Techniques DVD. Randy Hufford demonstrates in this video clip how you can also use the Dual Edge Ripper to quickly produce torn edges with and without a "white reveal", that gives a "perceived value" to your clients --even on inexpensive photo papers (you don't have to use a fine art paper for this effect)! This quick presentation technique will offer a great "add-on sale" (a lower-priced item for every budget) for your gallery. You can order the Epson "Finishing Solutions" DVD from us.
The Dual Edge Ripper has many options. Besides having two different "teeth" sizes, the ripper can be used not only to simulate a deckle edge around the border of a print, but it can be use to tear along the edge of the print's image, creating a very artistic effect for some subjects. This effect can also be varied depending on whether the print's image faces down or up when it is being ripped. Be sure to experiment to determine the deckle or rip effect you like best before proceeding to an important print.